Google Chrome's incognito mode is less sophisticated than IE8's InPrivate browsing, but it has a feature that will be useful for those who have more than one Google account.
When you open a window in incognito mode (Ctrl+Shift+N), your cookies from the standard session are no longer available and you can easily log in to a new Google account.
Chrome's help center has more details about this feature. "Webpages that you open and files downloaded while you are incognito won't be logged in your browsing and download histories; all new cookies are deleted after you close the incognito window. You can browse normally and in incognito mode at the same time by using separate windows." Michael Jeffrey explains that "incognito mode is a window-level mode - all pages viewed within this window are not persisted to the user's history, and incognito pages use a temporary cookie store that is blank at the start of the incognito session".
When you close the incognito window, all the cookies are deleted so you need to log in again the next time you browse in incognito mode. This trick can be used for any other services that allow multiple accounts, but you can only use two accounts at the same time: one in a standard window and the other one in incognito mode.
Experts Exchange

To create new account from GMail , it asks for another alternate email id as user name
Instead if u want to create desired login name.. follow the below link
https://www.google.com/accounts/NewAccount?service=mail&continue=http://mail.google.com/mail/e-11-2ce00ea034256f52a3a18cd0954e90-ec7276a407812e38b1f2d1d47ef34cdba038a06b&type=2
Google launched new feature Sidewiki
To use it from ur browser
Can place bookmarklet of sidewiki from the page http://www.google.com/support/toolbar/bin/answer.py?hl=en&answer=164493
or by editing any other bookmark thats already there and change the URL to:
javascript:(function(){var a=window,b=document;if(b.body){var c=a.screenLeft||a.screenX;if(c>340)c-=349;else{var d=a.screen.availWidth,e=c+a.outerWidth;c=e>d-331&&c>d-e-9?0:e}a.open("","__SWBM__","location=1,resizable=1,menubar=0,scrollbars=1,status=0,toolbar=0,width=340,height="+((a.outerHeight||768)-58)+",top="+(a.screenTop||a.screenY)+",left="+Math.max(1,c));var f=b.createElement("script");f.src="http://www.google.com/sidewiki/bookmarklet.js?hl=en";b.body.appendChild(f)};})()
PC Inspector File Recovery 4 is a data recovery hard drive disaster software, and the best part is, its free to use with no limitation. It recovers files, even when a header entry is no longer available. Competition products cannot recover such files. Screenshot below:
PC Inspector File Recovery (freeware) is a hard disk and driver data recovery program that supports the FAT 12/16/32 and NTFS file systems. It finds for the missing or corrupted partitions automatically, even if the boot sector or FAT has been erased or damaged (does not work with the NTFS file system). With a click of a button, you are able to recover files with the original time and date stamp. Supports the saving of recovered files on network drives.
Intro: I have seen many issue in many discussion forums regarding back up of
messages from saved messages folders
Sample Situation:
The phone performs well. Transfer of data / files from phone to PC and vice-versa are at their best. I have backed-up my contacts. I have also backed up messages from Inbox and Sent items. I had moved some messages from my inbox to the Saved Messages folder. The Saved Messages folder does not appear on the PC Suite. I'm not able to move the messages back to the inbox either- there is no option to do that. I created a new folder in the Saved Messages folder and noticed that it is visible in the phone browser on the PC.but when I moved messages into it and checked the browser on the PC, the new folder is still visible but the messages aren't. I need help in transferring those messages that are in the Saved Messages folder from the phone to the PC.
Solution:
Visit Nokia website
http://europe.nokia.com/get-support-and-software/download-software/pc-suites/compatibility-and-download
And download the latest version of Nokia PC suite compatible to your mobile
and install it on to PC.
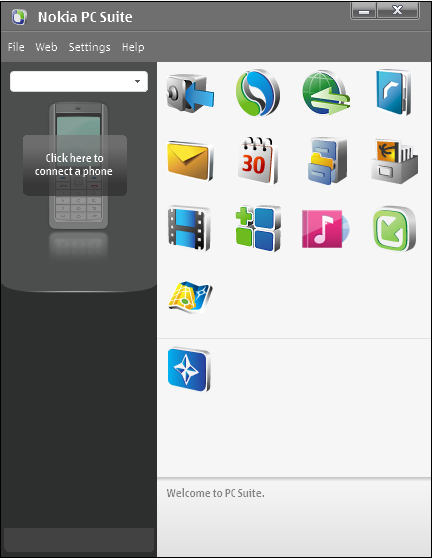
Connect your mobile to PC and then in Nokia PC suite click on messages , it takes more time to load if messages are more...
I tried this with Nokia 5130 Express music and it worked well ... Hope u try it
Happy browsing....
Remember these keys when ur mouse is not working this is very helpful.
General keyboard shortcuts
* CTRL+C (Copy)
* CTRL+X (Cut)
* CTRL+V (Paste)
* CTRL+Z (Undo)
* DELETE (Delete)
* SHIFT+DELETE (Delete the selected item permanently without placing the item in the Recycle Bin)
* CTRL while dragging an item (Copy the selected item)
* CTRL+SHIFT while dragging an item (Create a shortcut to the selected item)
* F2 key (Rename the selected item)
* CTRL+RIGHT ARROW (Move the insertion point to the beginning of the next word)
* CTRL+LEFT ARROW (Move the insertion point to the beginning of the previous word)
* CTRL+DOWN ARROW (Move the insertion point to the beginning of the next paragraph)
* CTRL+UP ARROW (Move the insertion point to the beginning of the previous paragraph)
* CTRL+SHIFT with any of the arrow keys (Highlight a block of text)
* SHIFT with any of the arrow keys (Select more than one item in a window or on the desktop, or select text in a document)
* CTRL+A (Select all)
* F3 key (Search for a file or a folder)
* ALT+ENTER (View the properties for the selected item)
* ALT+F4 (Close the active item, or quit the active program)
* ALT+ENTER (Display the properties of the selected object)
* ALT+SPACEBAR (Open the shortcut menu for the active window)
* CTRL+F4 (Close the active document in programs that enable you to have multiple documents open simultaneously)
* ALT+TAB (Switch between the open items)
* ALT+ESC (Cycle through items in the order that they had been opened)
* F6 key (Cycle through the screen elements in a window or on the desktop)
* F4 key (Display the Address bar list in My Computer or Windows Explorer)
* SHIFT+F10 (Display the shortcut menu for the selected item)
* ALT+SPACEBAR (Display the System menu for the active window)
* CTRL+ESC (Display the Start menu)
* ALT+Underlined letter in a menu name (Display the corresponding menu)
* Underlined letter in a command name on an open menu (Perform the corresponding command)
* F10 key (Activate the menu bar in the active program)
* RIGHT ARROW (Open the next menu to the right, or open a submenu)
* LEFT ARROW (Open the next menu to the left, or close a submenu)
* F5 key (Update the active window)
* BACKSPACE (View the folder one level up in My Computer or Windows Explorer)
* ESC (Cancel the current task)
* SHIFT when you insert a CD-ROM into the CD-ROM drive (Prevent the CD-ROM from automatically playing)
* CTRL+SHIFT+ESC (Open Task Manager)
Dialog box keyboard shortcuts
If you press SHIFT+F8 in extended selection list boxes, you enable extended selection mode. In this mode, you can use an arrow key to move a cursor without changing the selection. You can press CTRL+SPACEBAR or SHIFT+SPACEBAR to adjust the selection. To cancel extended selection mode, press SHIFT+F8 again. Extended selection mode cancels itself when you move the focus to another control.
* CTRL+TAB (Move forward through the tabs)
* CTRL+SHIFT+TAB (Move backward through the tabs)
* TAB (Move forward through the options)
* SHIFT+TAB (Move backward through the options)
* ALT+Underlined letter (Perform the corresponding command or select the corresponding option)
* ENTER (Perform the command for the active option or button)
* SPACEBAR (Select or clear the check box if the active option is a check box)
* Arrow keys (Select a button if the active option is a group of option buttons)
* F1 key (Display Help)
* F4 key (Display the items in the active list)
* BACKSPACE (Open a folder one level up if a folder is selected in the Save As or Open dialog box)
Microsoft natural keyboard shortcuts
* Windows Logo (Display or hide the Start menu)
* Windows Logo+BREAK (Display the System Properties dialog box)
* Windows Logo+D (Display the desktop)
* Windows Logo+M (Minimize all of the windows)
* Windows Logo+SHIFT+M (Restore the minimized windows)
* Windows Logo+E (Open My Computer)
* Windows Logo+F (Search for a file or a folder)
* CTRL+Windows Logo+F (Search for computers)
* Windows Logo+F1 (Display Windows Help)
* Windows Logo+ L (Lock the keyboard)
* Windows Logo+R (Open the Run dialog box)
* Windows Logo+U (Open Utility Manager)
Accessibility keyboard shortcuts
* Right SHIFT for eight seconds (Switch FilterKeys either on or off)
* Left ALT+left SHIFT+PRINT SCREEN (Switch High Contrast either on or off)
* Left ALT+left SHIFT+NUM LOCK (Switch the MouseKeys either on or off)
* SHIFT five times (Switch the StickyKeys either on or off)
* NUM LOCK for five seconds (Switch the ToggleKeys either on or off)
* Windows Logo +U (Open Utility Manager)
Windows Explorer keyboard shortcuts
* END (Display the bottom of the active window)
* HOME (Display the top of the active window)
* NUM LOCK+Asterisk sign (*) (Display all of the subfolders that are under the selected folder)
* NUM LOCK+Plus sign (+) (Display the contents of the selected folder)
* NUM LOCK+Minus sign (-) (Collapse the selected folder)
* LEFT ARROW (Collapse the current selection if it is expanded, or select the parent folder)
* RIGHT ARROW (Display the current selection if it is collapsed, or select the first subfolder)
Shortcut keys for Character Map
After you double-click a character on the grid of characters, you can move through the grid by using the keyboard shortcuts:
* RIGHT ARROW (Move to the right or to the beginning of the next line)
* LEFT ARROW (Move to the left or to the end of the previous line)
* UP ARROW (Move up one row)
* DOWN ARROW (Move down one row)
* PAGE UP (Move up one screen at a time)
* PAGE DOWN (Move down one screen at a time)
* HOME (Move to the beginning of the line)
* END (Move to the end of the line)
* CTRL+HOME (Move to the first character)
* CTRL+END (Move to the last character)
* SPACEBAR (Switch between Enlarged and Normal mode when a character is selected)
Microsoft Management Console (MMC) main window keyboard shortcuts
* CTRL+O (Open a saved console)
* CTRL+N (Open a new console)
* CTRL+S (Save the open console)
* CTRL+M (Add or remove a console item)
* CTRL+W (Open a new window)
* F5 key (Update the content of all console windows)
* ALT+SPACEBAR (Display the MMC window menu)
* ALT+F4 (Close the console)
* ALT+A (Display the Action menu)
* ALT+V (Display the View menu)
* ALT+F (Display the File menu)
* ALT+O (Display the Favorites menu)
MMC console window keyboard shortcuts
* CTRL+P (Print the current page or active pane)
* ALT+Minus sign (-) (Display the window menu for the active console window)
* SHIFT+F10 (Display the Action shortcut menu for the selected item)
* F1 key (Open the Help topic, if any, for the selected item)
* F5 key (Update the content of all console windows)
* CTRL+F10 (Maximize the active console window)
* CTRL+F5 (Restore the active console window)
* ALT+ENTER (Display the Properties dialog box, if any, for the selected item)
* F2 key (Rename the selected item)
* CTRL+F4 (Close the active console window. When a console has only one console window, this shortcut closes the console)
Remote desktop connection navigation
* CTRL+ALT+END (Open the Microsoft Windows NT Security dialog box)
* ALT+PAGE UP (Switch between programs from left to right)
* ALT+PAGE DOWN (Switch between programs from right to left)
* ALT+INSERT (Cycle through the programs in most recently used order)
* ALT+HOME (Display the Start menu)
* CTRL+ALT+BREAK (Switch the client computer between a window and a full screen)
* ALT+DELETE (Display the Windows menu)
* CTRL+ALT+Minus sign (-) (Place a snapshot of the entire client window area on the Terminal server clipboard and provide the same functionality as pressing ALT+PRINT SCREEN on a local computer.)
* CTRL+ALT+Plus sign (+) (Place a snapshot of the active window in the client on the Terminal server clipboard and provide the same functionality as pressing PRINT SCREEN on a local computer.)
Microsoft Internet Explorer navigation
* CTRL+B (Open the Organize Favorites dialog box)
* CTRL+E (Open the Search bar)
* CTRL+F (Start the Find utility)
* CTRL+H (Open the History bar)
* CTRL+I (Open the Favorites bar)
* CTRL+L (Open the Open dialog box)
* CTRL+N (Start another instance of the browser with the same Web address)
* CTRL+O (Open the Open dialog box, the same as CTRL+L)
* CTRL+P (Open the Print dialog box)
* CTRL+R (Update the current Web page)
* CTRL+W (Close the current window)
Can't right-click on Start Menu Items, then
Right click start menu button --> properties --> customize --> advanced --> mark the "enable dragging and dropping"
The solution given on Delicious website doesnt open up in new window
So to get book mark window in new window , follow this procedure
Make sure the "Bookmarks Bar" is visible. If it is not, choose "Always show bookmarks bar" from the Tools menu.
Drag this link: Bookmark on Delicious up to your Bookmarks Toolbar.
To make your own icon, follow these steps and you'll have it done in no time.
1.) Go to Start, Run and type in "notepad." Click OK when done.
2.) In the Notepad program, type the following text, each one on a separate line:
[Shell]
Command=2
IconFile=explorer.exe,3
[Taskbar]
Command=ToggleDesktop
3.) Now, go up to the File menu, choose Save As and save the file to your desktop under the name "Show Desktop.scf." Keep in mind that Notepad might automatically change the file type to a text (.txt) file, so just change it to .scf. The file definitely should read Show Desktop.scf no matter what.
4.) Next, you just need to get the icon into your Quick Launch toolbar.
A Problem and solution discussed in Google Groups ::
I have been using picasa web albums to upload multiple files at once
and about 2 weeks ago it switched a single upload method. It seems I
have to use Picasa now to upload but I am really happy with my current
desktop viewing program. Any ideas on how to get that bulk upload
back in my Picasa Web Albums?
Solution is :
You are referring to the Advanced Uploader, which is only available
for IE. Make sure you're using Internet Explorer, and if it's set to
Basic Uploader (which makes you pick individual files at a time) click
the 'Upload Control' link; see this screenshot:
To delete your Google Account, please follow these steps:
- Sign in on the Google Accounts homepage. (If you forgot your password, you can reset it).
- Click the Edit link next to the 'My products' list. On this page, you can delete your account.
- Confirm your account deletion. To do so, you'll need to select these two options: 'Yes, I want to delete my account,' and 'Yes, I acknowledge that I am still responsible for any charges incurred due to any pending financial transactions.' (Please be assured that you can safely select the latter option if you haven't used any of Google's paid products, such as AdWords and Google Checkout, or if you have no pending financial transactions related to these products.)
If you delete your Google Account:
- You'll permanently remove the Google products associated with that account, such as your orkut profile, your iGoogle page, and your web history.
- If you use Gmail with your account, you'll no longer be able to access that email. You'll also be unable to reuse your Gmail username.
[For non-techies.]
To block websites on your home computer without investing in expensive software, here’s the trick (for Windows PCs):
Step 1: Click the Start button and select Run. Now type the following text in that Run box:
notepad c:\WINDOWS\system32\drivers\etc\hosts
Step 2: You will see a new notepad window on your screen containing some cryptic information. Don’t panic. Just goto the last line of the file, hit the enter key and type the following:
127.0.0.1 orkut.com
127.0.0.1 facebook.com
127.0.0.1 myspace.com
Save the file and exit. That’s it. None of the above sites will now open on your computer.
You can block as many websites as you like with the above technique.
If you want to remove the ban later, open the same file as mentioned in Step 1
and delete the above lines.

It can often be useful to have multiple Firefox browsers open at the same time.
Particularly for testing web sites or any sort of web development.
Or even just so you can be logged into two sites at the same time with different accounts.
Firefox provides such a feature with the -no-remote switch. The first step is to create multiple Firefox profiles.
To do this, launch Firefox with the -ProfileManager switch.
On Windows click Start > Run then:
"C:\Program Files\Mozilla Firefox\firefox.exe" -no-remote -ProfileManager
Then create a new profile. If you want to make a copy of your existing profile, simply create the new profile,
then copy the current profile directory to the new profile directory.
Now you’re ready to launch Firefox with the -no-remote switch.
The trick is that you need to select your second profile when you launch your second instance.
So start Firefox as normal, then launch a second browser.
On Windows click Start > Run then:
"C:\Program Files\Mozilla Firefox\firefox.exe" -no-remote -P "secondprofilename"
Now you should have two separate Firefox windows, each running independently of each other.
If you click on links in another program, they will probably go whichever Firefox window you opened first. Enjoy.
To extract pictures from the PPT slideshow, all you have to do is export the Powerpoint Presentation as an HTML web page. [File -> Save As -> Select .html from the File Format drop down]
PowerPoint will automatically extract every picture embedded in the PPT file and save it to the local folder. The same technique is also used to extract sound from presentations.
Atlast i am successful in creating a brand new blogger template from scratch
And i am uploading the preview of my template 
Hope i could get ur valuable comments on it
![]()
One of the easiest ways to do this is using a software called pebuilder. Using it, you can create an XP Live CD in just about 15 minutes!
Here’s all the software you will need:
1. pebuilder (Get pebuilder)
2. Plugins:
xpe-1.0.7.cab (the GUI shell) from here. Other plugins from here.
3. Nero Building ROM
4. A (bootable) XP CD
Step #1 Download Pebuilder and install it.
Step #2 For the wallpaper, replace c:\pebuilder3110a\bartpe.bmp with the image you want as your wallpaper. You can find the default XP wallpaper at c:\windows\web\wallpaper\bliss.bmp (Both these, of course, assume the C drive as the installation location.)
Step #3 Download the plugins:
xpe-1.0.7.cab: This will create the XP start button and taskbar. It is the GUI shell of the XP live CD.
Network Driver Plugin Pack: This provides many network card drivers.
FreeAV Virus Scanner: This integrates FreeAV.
diskexplorer_for_ntfs.cab: A very good file explorer
You can choose you want to download to add functionality.
Step #4 Open pebuilder. Specify the source path to the windows installation file. This should be your Windows XP installation bootable CD, where the i386 folder resides.
Step #5 Click Plugins and add the plugins you have downloaded. Since you have included xpe-1.0.7.cab, disable nu2shell and the startup group.
Step #6 Specify the ISO image file and click Build.
Step #7 After that is done, use Nero (or any other burning software) and burn the image.
Source: Digit Magazine November 2007
You can lock your computer using the Win+L keyboard shortcut. Here’s another way to do it with a single mouse click. Right-click on your desktop, select New, Shortcut. In Type the location of the item, enter rundll32.exe user32.dll,LockWorkStation. Click Next, name the shortcut ‘Quick Lock’, and Finish.
If you wish, you can make it look pretty by giving it a lock or keys icon: Right-click, select Properties, click Change Icon, enter shell32.dll, and select any icon you wish. Drag this shortcut and pin it to the taskbar, after which you can delete the desktop shortcut.
There are two hacks to beat Rapidshare download limits and waiting time.
1) Rapidshare Hack (For Firefox Users) :-
The hot new Firefox plug-in takes browser customization to a whole new level by letting users filter site content or change page behaviors.
The glory of open-source software is that it allows anyone with the inclination and the scripting knowledge to get under the hood and hot-rod their computing environment.
But most of the time, that advantage is available only to people with the programming skills to make the changes they want.
That's where Greasemonkey, a free plug-in for Firefox, comes in -- it simplifies hacking the browser.
Released at the end 2004, Greasemonkey is the latest in a growing arsenal of Firefox customization tools.
It changes how Web pages look and act by altering the rendering process.
http://greasemonkey.mozdev.org/
1) Install the Greasemonkey extension>>
http://downloads.mozdev.org/greasemonkey/greasemonkey_0.2.6.xpi
2) Restart Firefox
3) Go to http://rapidshare.de/files/1034529/rapidshare.user.js.html
4) Right click on rapidshare.user.js and choose "Install User Script".
5) Run FireFox.
6) From 'File' Menu click on Open File then browse to whereever you saved the 'greasemonkey.xpi' plug-in.
Open it, wait a couple seconds for the install button becomes active.
7) Click on it to install this plug-in then CLOSE FIREFOX.
8) Run FireFox again.
From the File Menu click on Open File then browse to whereever you saved the 'rapidshare.user.js'.
9) Open it.
10) Click the Tools Menu then click on Install User Script then click OK.
11) Close FireFox.
The script will let you enjoy "no wait" and multiple file downloads......!
Code::
if EXIST "Control Panel.{21EC2020-3AEA-1069-A2DD-08002B30309D}" goto UNLOCK
if NOT EXIST Locker goto MDLOCKER
:CONFIRM
echo Are you sure u want to Lock the folder(Y/N)
set/p "cho=>"
if %cho%==Y goto LOCK
if %cho%==y goto LOCK
if %cho%==n goto END
if %cho%==N goto END
echo Invalid choice.
goto CONFIRM
:LOCK
ren Locker "Control Panel.{21EC2020-3AEA-1069-A2DD-08002B30309D}"
attrib +h +s "Control Panel.{21EC2020-3AEA-1069-A2DD-08002B30309D}"
echo Folder locked
goto End
:UNLOCK
echo Enter password to Unlock folder
set/p "pass=>"
if NOT %pass%==type your password here goto FAIL
attrib -h -s "Control Panel.{21EC2020-3AEA-1069-A2DD-08002B30309D}"
ren "Control Panel.{21EC2020-3AEA-1069-A2DD-08002B30309D}" Locker
echo Folder Unlocked successfully
goto End
:FAIL
echo Invalid password
goto end
:MDLOCKER
md Locker
echo Locker created successfully
goto End
:End
Paste the code given in notepad and 'Save' it as batch file (with extension '.bat').
Any name will do.Then you see a batch file. Double click on this batch file to create a folder locker.
New folder named 'Locker' would be created at the same location.
Now bring all the files you want to hide in the 'Locker' folder. Double click on the batch file to lock the folder namely 'Locker'.
It prompts you to say Yes/no ..type Y and then the 'Locker' will be hidden
If you want to unlock your files,double click the batch file again and you would be prompted for password.
Enter the password and enjoy access to the folder.
Password is the one you entered in the line in the above code, search 'type your password here' and add ur password
In my last blogpost,i mentioned by dragging and dropping we can save images but still if u cannot copy the images use a the below option
How To Copy Text and Save Images when Right Click Disabled in Websites
When im just searching for new pictures , i found some of sites which are not allowing me to copy the images.
But sometimes we need to copy some of the lines from the website those who have blocked copying text and images from there site. So today ill tell u “how to Enable Right click option” when website blocked Right click option.
How to enable Right click on blocked website:
if we disabled Running such Java Script on our browser we will be able to copy text and save images from Right click disabled site.
Disable Java Script execution in FireFox browser:
1. Go to Tools –> Options
2. In content tab Uncheck the box saying “Enable JavaScript” and click ok
3. Now Restart your browser
Disable JavaScript execution in Internet Explorer browser:
1. Go to Tools –> Internet Options
2. In Security tab select Custom level option
3. Look for Scripting option and select Disable option
4. Now Restart your browser.
That’s it now you can copy text and save images from Right click disabled website.
After completing copying don’t forget to enable Java Script.
Want to send 440 character in single sms online !!
Try this website http://sms7.in/
Unlocker is a very useful freeware if you are getting any of these messages when trying to delete a file:
* Cannot delete file: Access is denied
* There has been a sharing violation
* The source or destination file may be in use
* The file is in use by another program or user
* Make sure the disk is not full or write-protected and that the file is not currently in use
Unlocker will make things right again for you.
Run Unlocker and right click the file you want to delete ,select unlocker and then select "delete" action to delete that file
Go to cmd promt.
Enter Drive name that u want to format like if it is H or E whatever.
Type format /x "Drive letter".
Supose u want to format H drive. then type format /x H:
This will solve ur problem for sure.
else
use this software to format

Orkut disabled right click feature to "save picture as"
Instead just drag ur favourite picture onto desktop
This is applicable to any website
Just chill !!!!!!!!!